Pwnagotchi
A Raspberry Pi Zero W running an AI that learns to harvest WPA handshakes from WiFi networks around it — the more it roams, the better it gets.
Hardware
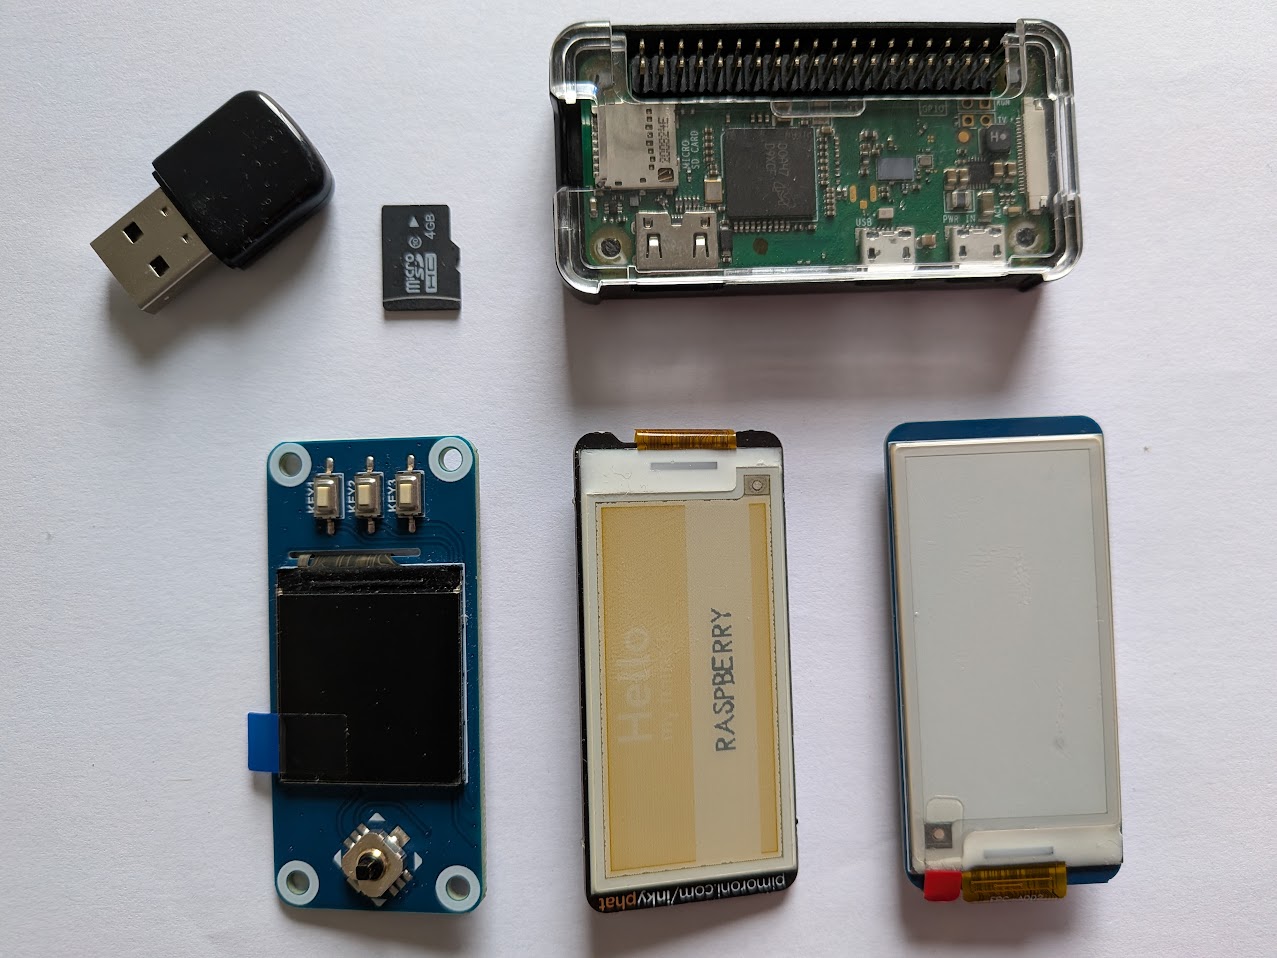
1
Raspberry Pi Zero W or Zero 2W
The "W" (WiFi) model is required. Zero 2W is faster — recommended. Get the WH version (pre-soldered header) to avoid soldering.
2
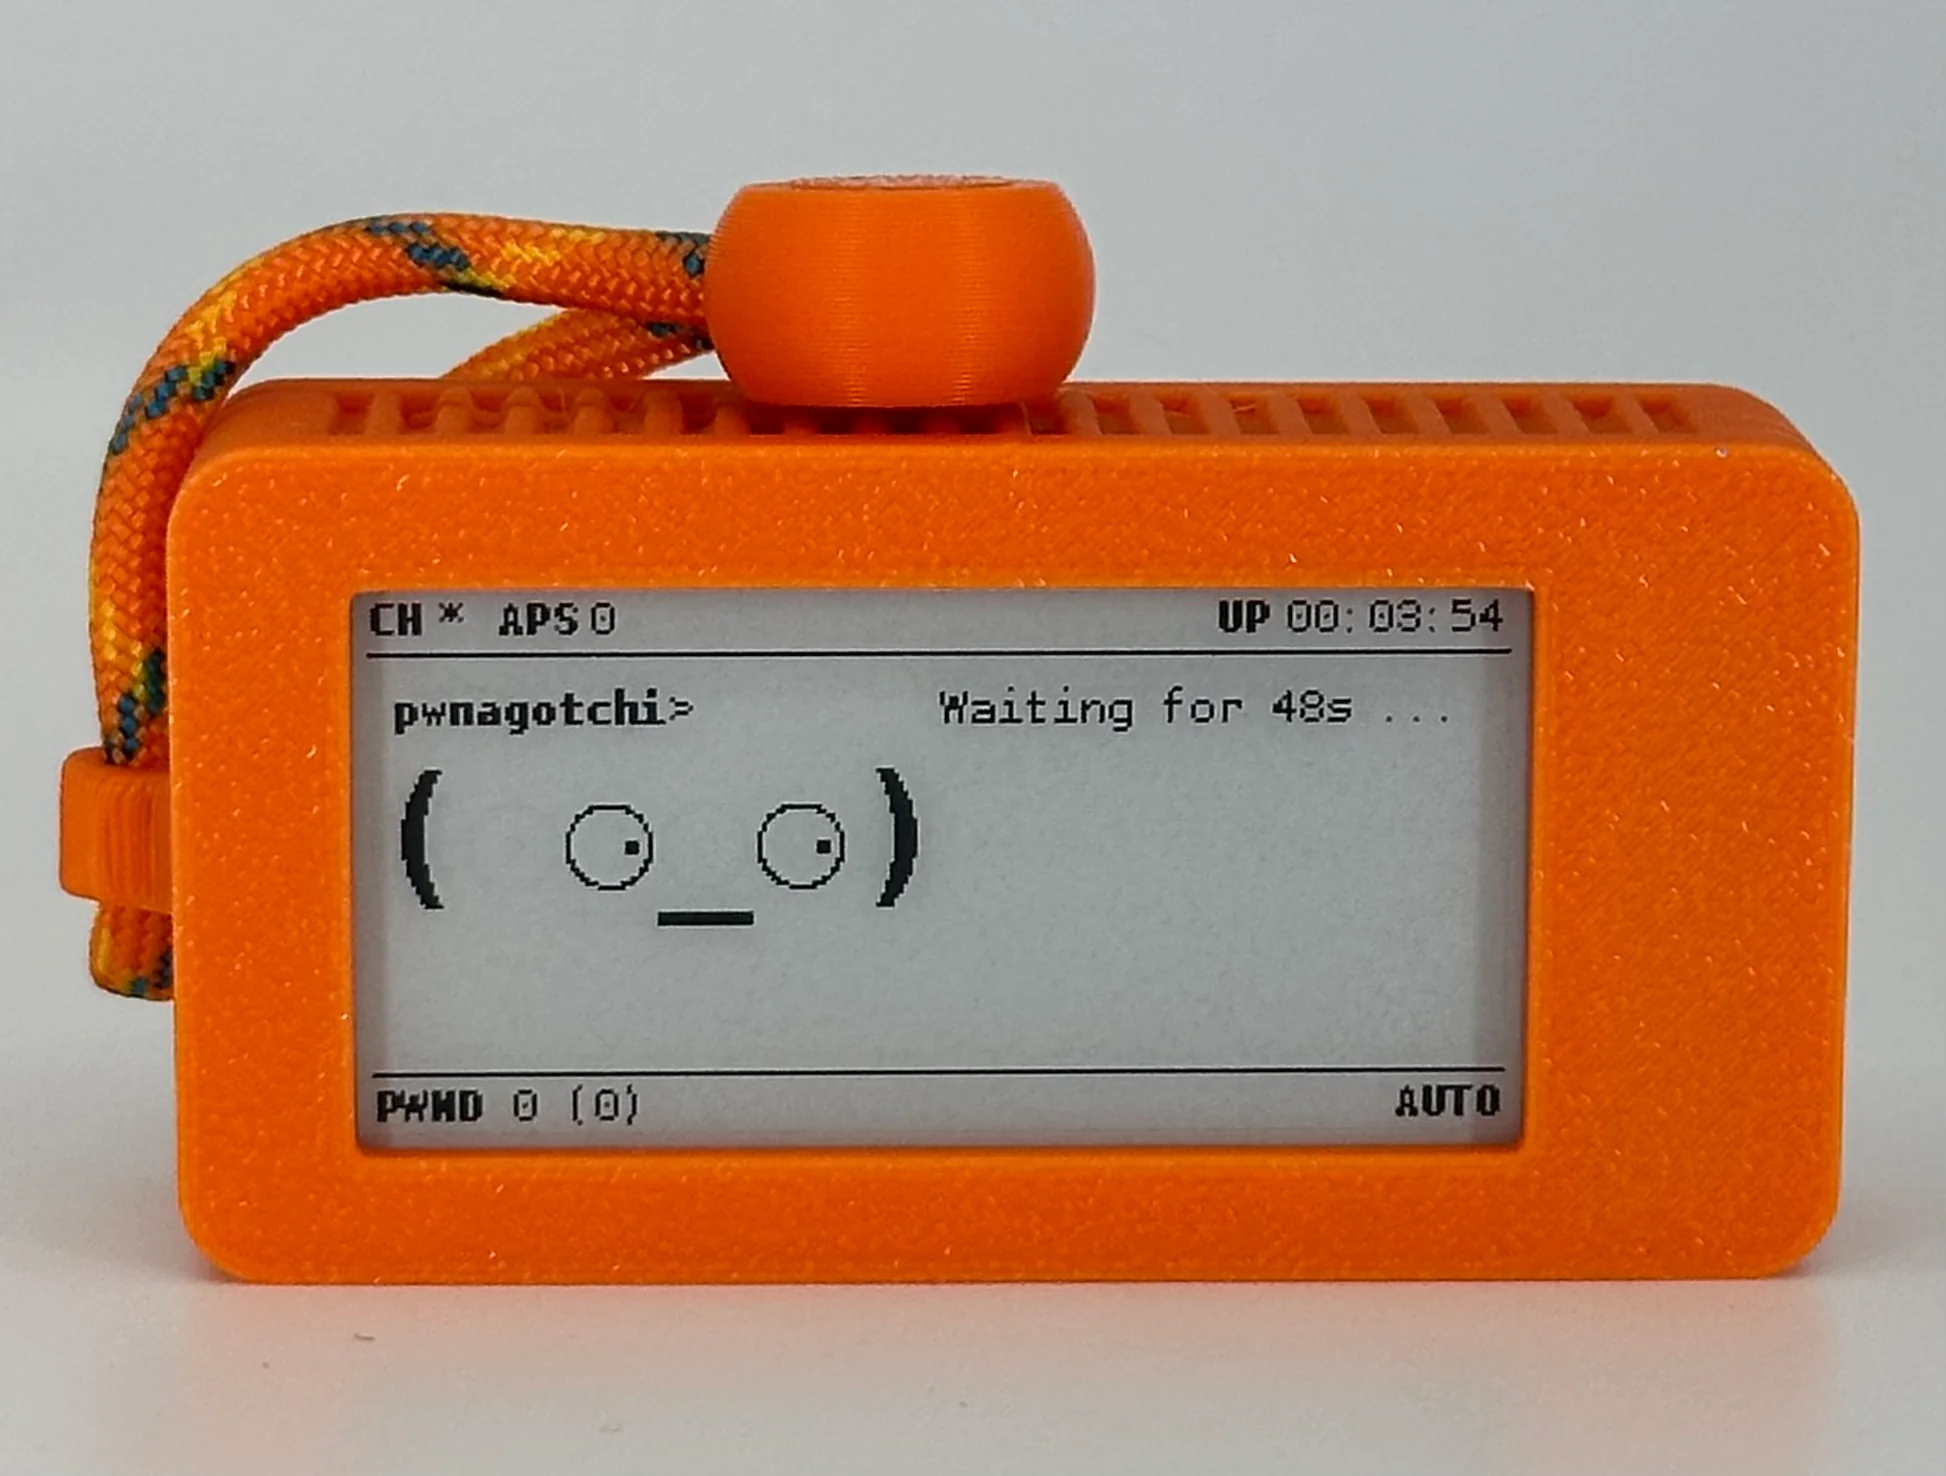
2.13" e-Paper display
Waveshare 2.13" V4 recommended. Know your exact model — the display type must match your config.toml exactly or nothing shows.
3
microSD card — 16 GB+
Class 10 / A1 or better. The OS image is ~1 GB but handshake files accumulate over time.
4
Power bank — 5V / 2A
Pocket-sized is fine. Clip it to your bag and let the Pwnagotchi roam with you.
5
USB data cable (micro-USB OTG)
Must carry data, not just power. Many cheap cables are charge-only — use a cable you know works for data transfer.
Getting Started

1
Flash the image
Download the latest Pwnagotchi image and flash it to the microSD card using Raspberry Pi Imager or Balena Etcher. Use the official image from pwnagotchi.ai for the most tested base.
2
Create config.toml before first boot
After flashing, the SD card appears as a boot drive. Create
/boot/config.toml with at minimum your display type and personal network whitelist. Getting the display model wrong is the #1 setup mistake.
# Minimum config.toml
main.name = "pwnagotchi"
main.lang = "en"
# Your home/work networks — Pwny ignores these
main.whitelist = [
"YourHomeNetwork",
"YourWorkNetwork"
]
# Display — match your exact model
ui.display.enabled = true
ui.display.type = "waveshare_2" # e.g. waveshare_2, waveshare_4, inky
ui.display.color = "black"
# Bluetooth tethering (optional — lets you connect via phone)
main.plugins.bt-tether.enabled = true
main.plugins.bt-tether.devices.android.enabled = true
main.plugins.bt-tether.devices.android.ip = "192.168.44.44"
⚠ Display type must be exact
A wrong ui.display.type value is the most common reason the screen stays blank. Check your display's exact product page on Waveshare and match the string precisely.
3
Assemble & first boot
Connect the e-Paper display to the Pi's GPIO header, insert the SD card, and connect power via the PWR port (not the USB port — that's for data). First boot can take 5+ minutes while it initialises. The display will show the Pwnagotchi face once ready.
USB ports on the Pi Zero
The Pi Zero has two micro-USB ports. PWR: power only. USB: data + power (OTG). Connect your power bank to PWR. Use the USB port for SSH access from a laptop.
4
Connect & access the web UI
Connect your laptop to the Pwnagotchi via USB (OTG port). It presents itself as a network interface. SSH in at
pi@10.0.0.2 (default password: raspberry). The web UI runs at http://10.0.0.2:8080. Alternatively, use the bt-tether plugin to connect via Bluetooth from your phone.✓ Change the default password
First thing after connecting: passwd to set a new password. The default is public knowledge.
5
Take it for a walk
Put it in your bag or pocket and go somewhere with WiFi density — a city street, a shopping area, a train. The AI learns as it goes. Handshakes accumulate in
/root/handshakes/ as PCAP files.Links
pwnagotchi.ai
Official project · image downloads · documentation
pwnagotchi.org
Community site · alternative images · plugin directory · cases
GitHub — evilsocket/pwnagotchi
Source code · issues · releases
Practical setup guide & advanced notes
Medium · plugins, bt-tether, display config, troubleshooting